 |
 |
 |
 |
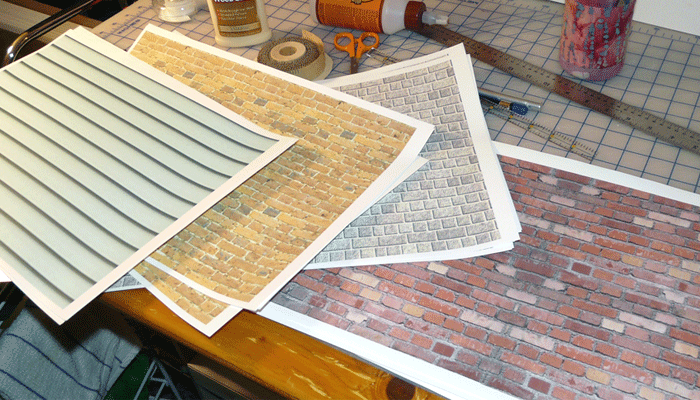
The buildings all get their outside surfaces next. To do this, I went online and found various images of brick walls and siding that I liked, then took them into Photoshop, cleaned them up, changed colors where necessary and made blocks of each. Then I printed them out on heavy paper. This was a big useage of ink for my printers, but it was the easiest way to make the surfaces I wanted. I can use scrapbook papers for inside walls and floors, which will be a lot cheaper, but I couldn't find any good outside surfaces. It took three color and one black ink cartridge to print all the outside walls, but these are mostly 11x17 paper and pretty solidly covered.

First up is building number one, the sweet shop/art supply store. I chose a dark red old brick for this building. First I cut off all the unprinted edges on the paper, then starting at the lower back edge, I fit the first piece and folded it at the corners.

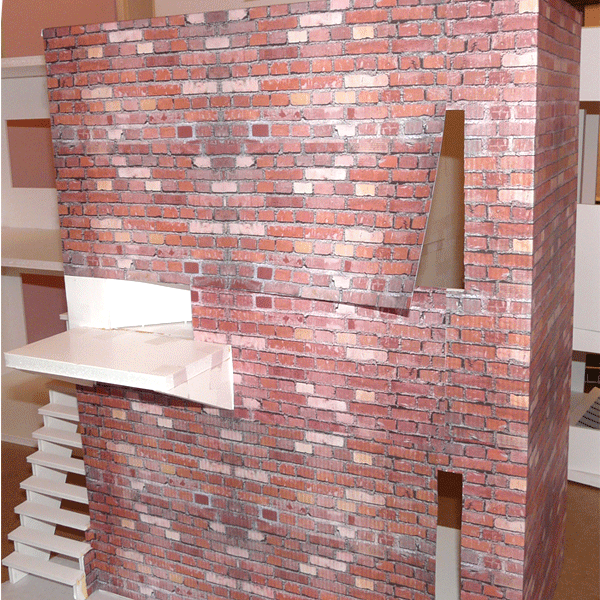
The first piece is attached and smoothed down nicely (an old credit card works great as a squeegy for smoothing out the sheets as I put them on). I cut out the small section that covered the edge of the window. I'm using glue sticks to apply the paper to the building.

Next piece sized up and ready to be attached. I apply the glue to the building, making light pencil marks so I know how far to go for each piece. I also have to be careful when I apply the paper, as it doesn't like to move once it hits the glued wall.

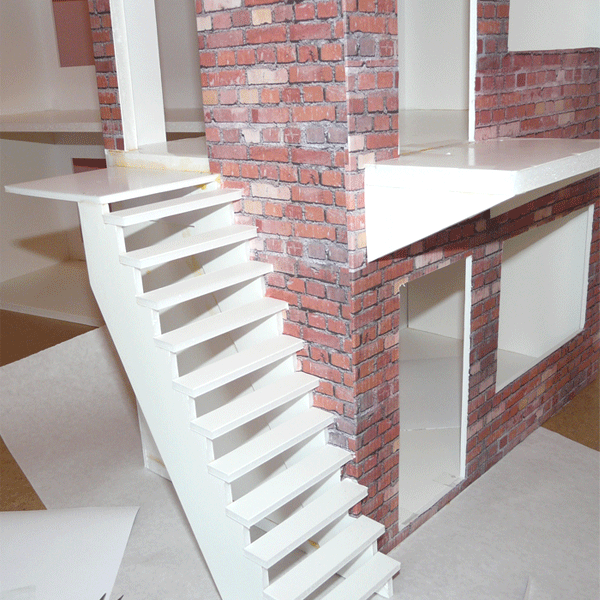
The second piece is glued in place. I sure wish I had remembered not to attach the stairs until AFTER the buildings had their outsides put on. Working around them is a bit of a pain. I'm ignoring them for now and going back to add a second piece above the first ones.

Test fitting the next piece above the first piece. I need to overlap them a bit to get the bricks to look right. Notice how nicely all those messy foamcore joints and taped sections just disappear!

Next piece glued in place and edge of window cut out. I seem to have forgotten about cutting out the rest of the first window. I'll leave it for now. Sometimes I cut them all out with a craft knife once the paper is dry, sometimes I cut them out right away. Doesn't seem to to make much difference.

Working around the building, getting all the big pieces in place and saving all the little spots and stairs for last.

For small areas, I cut a small piece to fit, test fitting it before glue, to make sure I match up the bricks. For small pieces like this, I apply the glue to the back of the paper instead of on the building, to make sure I get all the edges.

Can't ignore the wall next to the stairs any longer. I took a piece of tracing paper and made a template to fit between the stairs. A little tweaking here and there and it was ready to trace onto the back of the brick paper. It's cut out and ready to go.

It's in place and looks pretty good. Not perfect, but once the buildings are all in place on the street, no one will ever get this close a look at it again.

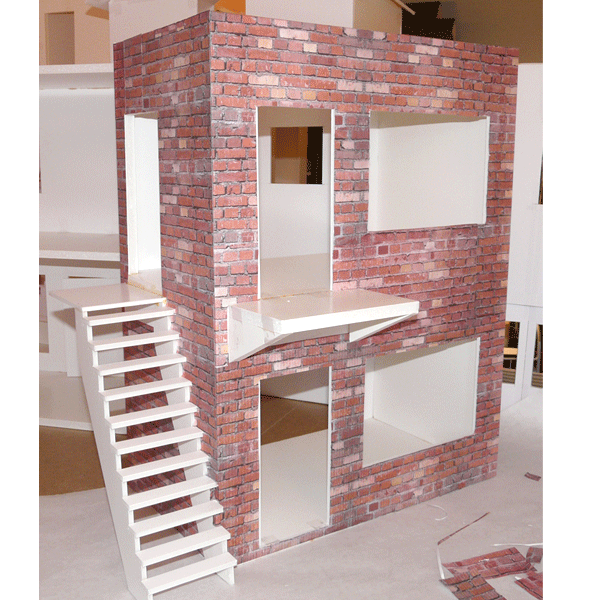
Building one with its brick outer walls. I'll do all the outsides of the building first I think, before going back to finish each individual building. Right now I shove all the buildings around to make room for maneuvering the one I'm working on. This building (the smallest), took 8 sheets of 11x17 paper and 5 glue sticks. I buy the glue sticks at Sam's Club, where they're less than $7 for a package of 24. I bought three packs, for $20, which I think will be enough to do all the insides and outsides of everything. A LOT cheaper than the glue sticks I found anywhere else.

Building two, yarn/fabric shop & pet store is next and gets grey brick. It gets started the same as the first building. I seem to like this corner for starting on a building, maybe because I'm left-handed? Notice where I was running out of ink when this sheet was being printed, so the right edge is lighter than the rest. Fortunately, it's next to the stairs when this building is sitting beside building one, so it won't show. I lucked out on that one!

Applying the glue for another brick section. I'm careful to make sure I get the glue solidly around the edges of the walls and doorways.

The entire building is bricked and ready for window cutting. This one went fast without the stairs to work around.

Cutting out the windows and doorways from inside the building goes quickly.

Building two ready for embellishing! I like embellishing and finishing the outsides of the buildings a lot, so I'll hurry to get all the outside walls on. Two down, five to go!

 |
 |
 |